Archive for June, 2012

Weak Potato Harvest in 2012

The white potato plants (the part above-ground) died back early this year, so I was forced to harvest whatever was down there.  I ended up with about  twice as much weight in harvested potatoes as I used for seed potatoes.  Meh.

I definitely have a lot to learn about growing white potatoes, but I can blame the drought this year.

Rotten Raised Bed

The raised bed that held the garlic bit the dust while I was using a fork to loosen their roots.  This wood is pine, and was only about 4 years old.  Can anyone tell me how long cedar would have lasted?  If you have direct experience with using it, that would be great.

Also, is it safe to use those new recycled composite plastic deck boards to surround a food garden raised bed, or would they leach yuckies into my dirt?  Anyone ever research that?

Upside Down Garlic

Last fall I apparently planted one of my cloves of garlic upside down.  With a great amount of effort, it grew anyway.  I salute it’s resolve.

Dill-Pickled Garlic Scapes

We are trying garlic scapes cold processed as refrigerator pickles with a dill brine this year.  So far it seems really spicy.  These weren’t really canned, they are just being stored in a glass jar.

If you have made this kind of pickle before, please tell me what you cooked with the scapes after pickling them. What did you use them in? I can only make so much tuna salad.

Beets Harvested and Canned 2012

I harvested my beets a few days ago.  I didn’t get any pictures of them with their tops still attached, but they filled two half-bushel baskets.  I planted six 8-foot rows, and my root harvest is shown below.

Cut off the tops!  Eat them if you like greens.

Wash off the dirt!

Put the washed beets in a pot (or two) and boil them for about 20 minutes to make the skin really lose and easy to peel.

The skin will slip right off, along with the stem stubs.

Peeling in a messy step.

Get your recipe book and spices together!

Combine the beets with the vinegar, sugar, spices, whatever is in your canning recipe and boil them again.

Get your canning jars and lids simmering, and then fill the jars with the hot beet mixture.

Process your beets for 20 minutes (for pints) in a boiling water bath.

From six 8-foot rows of beet seeds I canned 1 gallon of beet roots.

The last time I canned beets I skimmed off the spices. This time I canned the spices into the jar. I want to see which way I like better. I keep notes in my cook books.

Garlic Harvested in late June, 2012

I harvested my garlic this week.  Mrs. Jimmy helped me get these 100 bulbs out of the ground.

After a little online research, I have discovered that the variety is named “Chamisal Wild.”  It was found by Kristen Davenport Katz from Boxcar Farm near Santa Fe, New Mexico.  After describing it to Kristen, she told me about the recent history of this purple-stripe hardneck:

It was named by us… and the story goes that the postmistress in our small village of Chamisal, NM, told us to go look by the little ditch that ran through the village. The village has been settled since the 1600s by the Spanish, a small Northern New Mexico mountain town. So the postmistress, Noami, told us where to go look because she knew we grew a lot of garlic. So one afternoon in early spring we went wandering down by this creek near an old adobe (hardly anything left of it, really) and I was walking around thinking, gosh, there’s no garlic here … then the scent hit me in the nose and I realized I was walking through a FIELD of garlic that looked like a thick-bladed grass. We went back in August after the bulbils were set and harvested below-ground bulbs and planted it… within 3 years the bulbs were as big as fists. Plus, it tastes great. I think this was 2004. So we’ve been growing it eight years now. Glad you enjoy the garlic, it has spread wide because it’s such a lovely variety.

Many of these garlic bulbs are in the 2 1/2 inch range. A few are 3 inches across. The ones that I left the scapes on are only 1 to 1 1/2 inches in size.  That does seem to matter.

For now, the garlic is resting on my back porch picnic table.  This weekend I will have to get it hanging up in the garage to cure for a few weeks. The garlic is done curing when you can cut the bulbs from the stems and there is no moisture, no juice dripping.

The biggest of them all will become my seed garlic. I’ll plant next year’s crop in a few months.

Giant Syrian Green Tomatoes Mid-June 2012

Giant Syrian is another potato-leafed tomato plant variety that I am growing this year.  It is billed in seed catalogs as being capable of producing 1 pound fruits.  In my experience, the first tomato to set on a given plant is usually the biggest one.  If you want to maximize the size of that first fruit, you have to pick off all the other ones that come after it.

I’m not trying to break any records, so I’m leaving all the fruit on the plant.  I would rather get a whole bunch of 6 or 8 ounce tomatoes than to just have one really impressive specimen.

The plant is growing very well and the fruit shows no sign of turning color yet. That’s fine by me, just keep growing!  The best part…so far, NO DISEASE, NO BLIGHT!

Cut off the garlic scapes? What are bulbils?

Conventional wisdom says that when the hardneck garlic you are growing sends up scapes, you should cut them off so that the plant doesn’t spend any energy growing a part that you won’t use. If you cut off the scapes, they say, you’ll surely get bigger garlic bulbs.  That could be so, but I was curious this year to see what, exactly, will grow if you leave the scape on the plant.

This garlic “flower” (the bulbil) has been on the plant for about 3 weeks after I would have normally cut off the scapes.  It has grown plump, and I found myself curious about what lies inside.

I tore open the covering to reveal about two dozen tiny garlic cloves.  Freaking BABY GARLIC!  Each one is basically a “seed clove” that will propagate the parent garlic variety.  Garlic Seeds? Yes please.

I have read that planting these very tiny cloves, will result in an undersized garlic bulb growing the next year.  If you turn around and replant for 2 or 3 years in a row, the resulting crops will get bigger and bigger each year until you are producing garlic the size of the original parent plants.

One reason to plant from bulbils instead of (or in addition to) cloves, is that it is a very fast way to ramp up your production of any given variety.  Whereas planting the 10 cloves from the main garlic bulb will increase your planting stock at a decent rate, planting all the cloves and all the bulbils will increase your stock twice as fast or faster.  In 4 year’s time, you could turn 1 pound of seed garlic into a crop that covers an entire acre.

Another very important reason to plant the bulbil’s mini-cloves is that if your crop’s roots become infected with a soil-borne disease in any given year, it is very likely that the bulbils, living 2-3 feet up above the ground, will NOT share the infection.

Needless to say, I am going to be growing an experimental container of these for next year. I tore the ones in these photos off the parent plant too soon, but there are still a dozen or more in the garden that I’ll cure with the rest of the garlic harvest.

So WHY does the the garlic grow bulbils?  If left unharvested in the yard or field, the top of the garlic plant would brown, wither, and fall over.  The bulbil would find itself touching the ground in a location about 3 feet from where the parent clove grew.  The winter snow would press it down and in the spring it would root itself right there.  In this way a hardneck garlic patch will expand itself and keep reseeding, potentially forever.

Cast Iron Grilling and Brats

It would appear that this cast iron pan and these bratwurst were made for each other.  Just look how nicely they fit onto the grill. 🙂

When grilling outdoors, whether charcoal, gas or an open camp fire, cast iron pans always work. Don’t try this with your teflon coated pans or your stainless steel with built-in rubber grips on the handles!

Green Cabin Tomatoes Mid-June 2012

Above is the flower from an open-pollinated heirloom variety of tomato that I have grown every year since 2009.  “Cabin” was the name on the list I chose from at Wintersown.org.  This tomato was listed as RARE on their listing that year and has been absent from the list ever since.  It’s by-far my favorite tomato and it’s a personal project to continue this fruit, as I could be literally the only person growing it anywhere right now.

Cabin tomato has shown itself to be resistant to the blights that my tomatoes end up getting eventually during most growing seasons.  Where my other plants have already died in August or September, Cabin has continued to grow until first frost around Halloween.  Cabin provided me with a red tomato (picked green) on Thanksgiving one year.  That’s pretty good for Illinois.
The green tomatoes shown in this post should ripen to a nice dark pink tone within 2 weeks.  They are usually 3 to 8 ounces, with the average more towards 4 ounces.

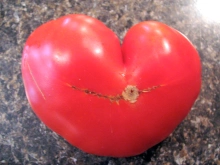
Many of my Cabin tomato flowers were multi-blossoms this year, so I might get a couple of fused fruit that are larger than normal.  As you probably saw from the photos, Cabin is a potato-leaf type tomato.  Oh, taste!  Cabin is excellent eating.  It’s meaty, average in acidity and works equally well for eating raw or cooking into sauces.

Finally, I don’t want to be the only grower saving seeds for this tomato.  If you are interested in also growing Cabin next year, and will save seeds from it to keep this heirloom around for the future, please let me know.  If you have trouble with blights and want a plant that will grow along while others struggle in the same spot, please consider Cabin.